Do you remember my first post on how to get AndroVM up and running in VirtualBox? Those .ova files you downloaded were from the
AndroVM project. What I didn't mention in my blog post, however, is that the AndroVM project went commercial, and it is now called Genymotion. First, I will tour you through Genymotion, and then I will review this product.
First and foremost, you will need a Genymotion account. You may create one, or login,
here. Once you have logged in, you will see the settings page for your account, which will let you change account details, or if you so wish, delete your account. Anyway, you should read the user guide before you download Genymotion. The options you should use are pointed out in this screenshot.
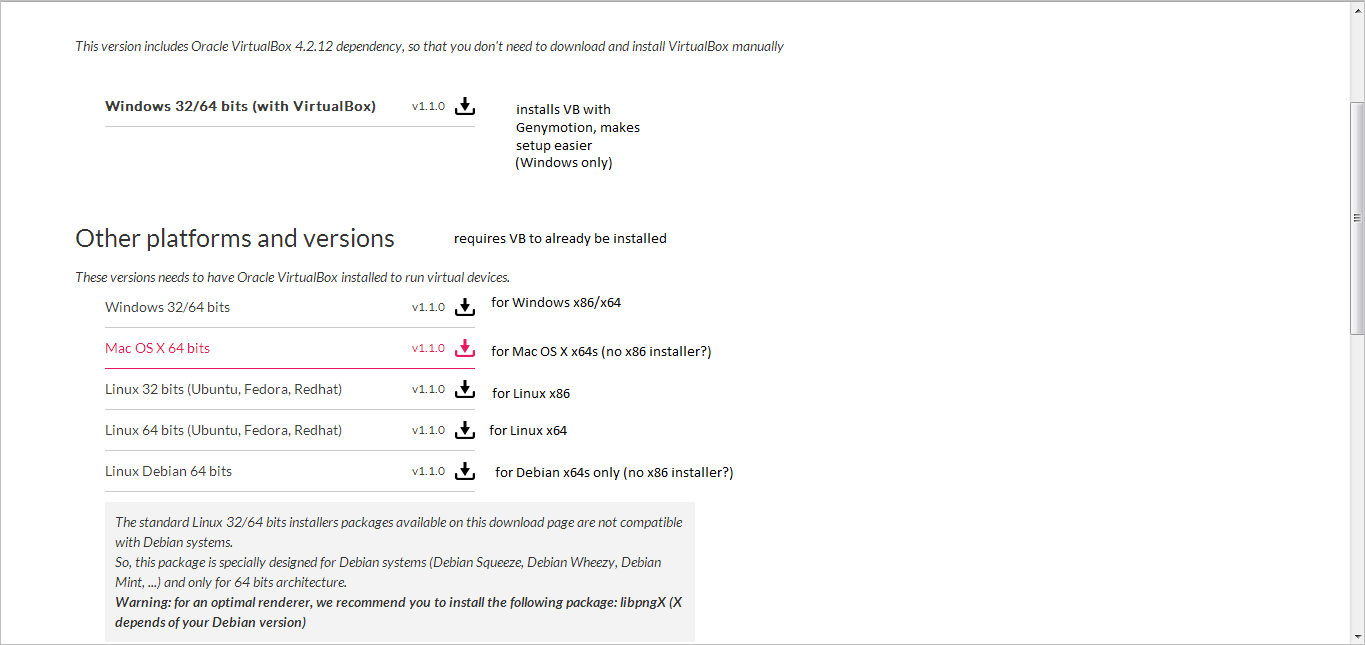
When you click "Download Genymotion", you will see a number of different options. These options are broken down in the second screenshot:
Click on the file you want to download, and do your stuff with the installer. Once you've installed Genymotion, open it. As it starts up, you will see a splash screen. This is what the main Genymotion program looks like:
When you click "Add", you will be asked for your credentials to login to Genymotion:
Enter your Genymotion account login info, and click "Connect" in the login window.
Once you sign in, you will see a list of virtual devices you can download. The field above this, or "Already downloaded virtual devices", shows a list of devices that you have already downloaded, and can re-use without having to repeat the download process. Anyway, you can pick the device you want to emulate in Genymotion, and click the "Add" button. I recommend the virtual devices with Google Apps built-in, but you may choose any device you want. In this case, we will be emulating a Nexus 7 (Android 4.1.1), tablet+phone version, with Google Apps.
When you have chosen your preferred device and clicked "Add", you will see a confirmation window asking you if you want your chosen device:
Click "Next" if this is what you want, and the download will start:
Once the download completes, click "Next":
Name your new creation, and click "Create".
Click "Finish", and it's back to the main Genymotion screen:
Need to configure your device? Right-click the device listing, and click "Device settings". If you want to remove it, right-click on it, and click "Delete".
To start your device, double-click on it, or click on your device, and then "Play" at the top of the window.
When you first start your device, you may be asked this question:
If you have the Android SDK, click Yes. If you don't, click No or "Stop asking me". Here's what the Genymotion Emulator looks like:
From this point, you're free to explore Android. See
my first post (specifically, steps 5 and beyond) for instructions on setting up Android. Keep in mind, however, that
you should always start any Android devices that you downloaded within Genymotion. Just in case you get any ideas to start your device in VirtualBox, here's something you should know. Your device
does show up in VirtualBox, but you may not want to start it.
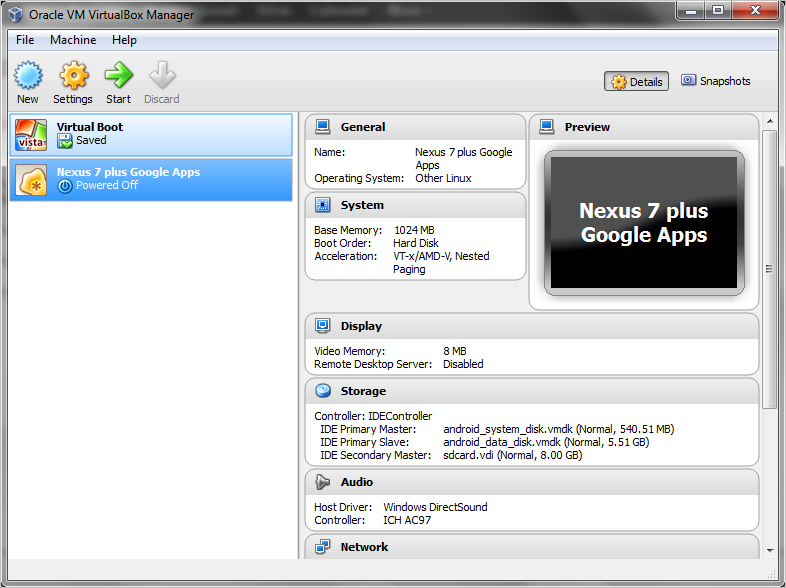
If you start your Android device in VirtualBox, this is what you see:
You get the picture.
Review
All in all, this is a great program for emulating Android. It doesn't showcase all the features Android has, and there are a few bugs with Genymotion, but it's still a useful tool for the Android beginner, developer, or anyone who's curious as to what Android has in terms of features.


No comments:
Post a Comment